
How to Install DIY Security Systems
Homeowners are increasingly looking for ways to secure their homes without spending a lot of money. One option that has become increasingly popular in recent years is the installation of do-it-yourself security systems. These systems can be installed relatively easily and often at a fraction of the cost of traditional security systems.
In this article, we will discuss the basics of installing a do-it-yourself security system. We will cover the tools and materials you will need as well as the steps involved in the installation process.
Why Is a DIY Security System Beneficial?
There are several benefits to installing a do-it-yourself security system. One of the most obvious benefits is cost savings. Traditional security systems can be quite expensive, often costing hundreds or even thousands of dollars. DIY security systems, on the other hand, are much more affordable.
Another benefit of do-it-yourself security systems is that they are relatively easy to install. In most cases, you will not need to hire a professional installer. This means that you can save even more money on the installation of your security system.
Finally, DIY security systems offer homeowners a greater degree of control over their home security. With a traditional security system, you are typically reliant on the security company to monitor your home and respond to any security breaches. With a DIY system, you can monitor your home yourself and take immediate action if necessary.
Things to Consider Before Getting a DIY Security System
Before you purchase a do-it-yourself security system, there are a few things you should keep in mind.
The first thing you need to think about is your specific security needs. What do you want your security system to do? Do you need it to simply deter burglars? Or do you need it to also monitor for fires, carbon monoxide, or flooding? Knowing what you need your system to do will help you choose the right components.
Another important consideration is your budget. How much money are you willing to spend on your security system? Keep in mind that the price of the components is only part of the equation. You also need to factor in the cost of installation and monitoring.
Installing a do-it-yourself security system requires some basic knowledge of electrical wiring and carpentry. If you do not feel confident in your ability to install the system, it is best to hire a professional.
Another thing to consider is how much time you are willing to spend on the project. Installing a security system can be a fairly time-consuming process. If you do not have the time or patience to complete the installation, it is best to hire a professional.
Now that you know what to consider before getting a DIY security system, let’s take a look at the tools and materials you will need for the project.
The tools and materials you will need for your project will vary depending on the type of system you choose to install. However, there are a few basics that you will need regardless of the system you choose.
- Wire cutters
- Wire strippers
- Drill
- Screwdriver
- Hammer
- Level
- Tape measure
- Pliers
- Hole saw
- Cable ties
- Electrical tape
- Wire nuts
- Carpet knife
- Drywall saw
- Stud finder
The specific tools and materials you will need will vary depending on the type of system you choose to install. Consult the instructions that come with your security system for a complete list of tools and materials.
Steps to Installing a DIY Security System
Installing a do-it-yourself security system is a relatively simple process. However, there are a few steps you need to follow to ensure that the system is installed properly.
Choose the Right Location for Your Control Panel
The control panel is the brains of your security system. It should be located in a central area of your homes, such as a basement or closet.
Drill holes for your wiring. Once you have chosen the location for your control panel, you need to drill holes for the wiring. Use a hole saw to drill 3/4-inch holes in the wall for your wiring.
Run Your Wiring
Once you have drilled the holes, you can start running your wiring. Run the wiring from the control panel to each of the devices you will be installing.
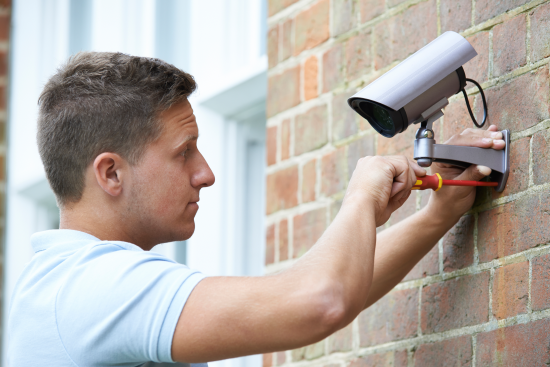
Install Your Devices
The next step is to install your devices. This includes things like door and window sensors, motion detectors, and cameras. Consult the instructions that come with your devices for specific installation instructions.
Test Your System
Once you have installed all of your devices, it is time to test your system. Turn on the power to your control panel and test each device to make sure it is working properly.
What Not to Do
There are a few things you should avoid doing when installing your security system.
Do Not Skimp on Quality
When it comes to security, it is important to use high-quality components. Cheap materials and inferior craftsmanship can compromise the security of your home.
Do Not Put Your Control Panel in an Obvious Location
Burglars will often target the control panel in an attempt to disable the security system. Choose a location that is not obvious and make sure it is well-hidden.
Do Not Forget to Test Your System
It is important to test your system regularly to make sure it is working properly. Testing should be done at least once a month.
Final Thoughts
Installing a do-it-yourself security system is a great way to save money on the cost of home security. However, there are a few things you need to consider before getting started. Make sure you have the skills and knowledge necessary to complete the project. In addition, be sure to set aside enough time to properly install the system. With a little planning and effort, you can have a security system that will protect your home for years to come.
